


As part of her Stashbusting Crusade, Robin from the T-Shirt Diaries invited me to write a guest post! Spring is a great time for stashbusting/purging/cleaning! Just in case you missed it, here are the coasters I made!
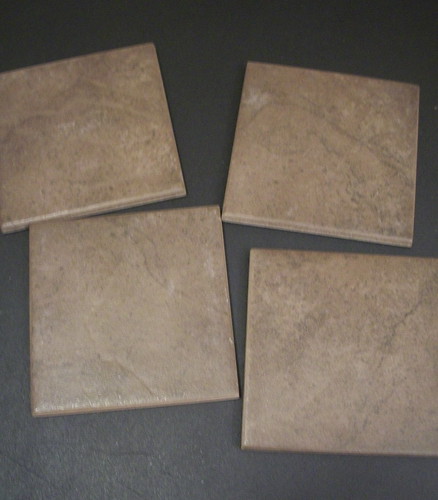
Today I'm busting some ceramic tiles from my stash. I bought them at ReStore for $0.20 a piece with the intention of making coasters as gifts at Christmas time. Then I wanted to get them done for my friend's birthday in February. Now it's April....
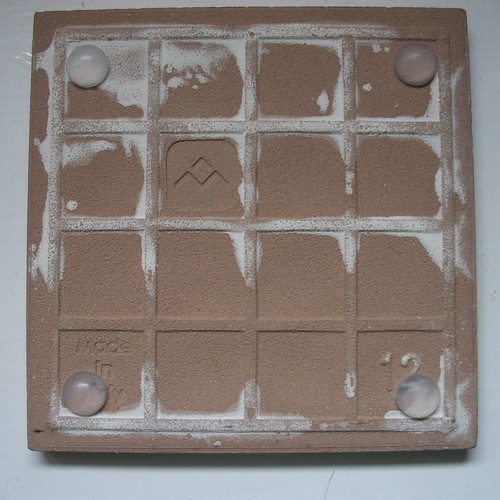
I started with these tiles. I love going to ReStore because they have so much neat stuff at good prices. It's nice to know that all these construction materials are being saved from the garbage!
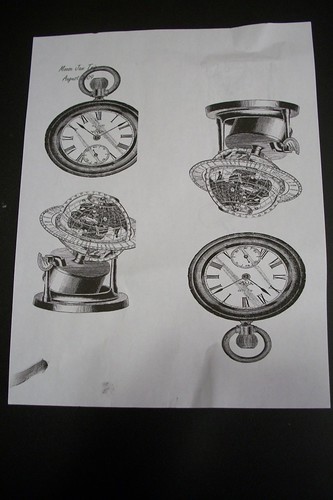
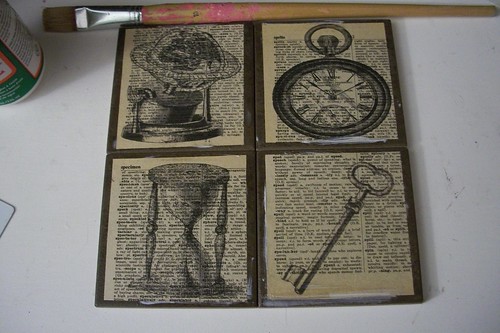
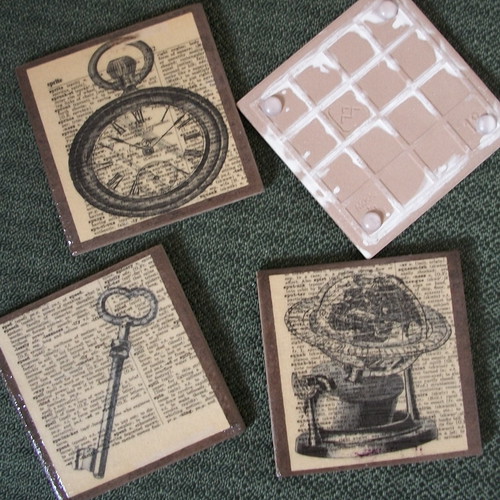
Next I found some images I liked over at the Graphics Fairy. I've talked about Karen's site many times before - if you haven't checked it out, why not?!

I picked 4 images I liked and resized them in a word document and placed them how I liked. I did a test run on plain paper to make sure they were the right size and in the right position.
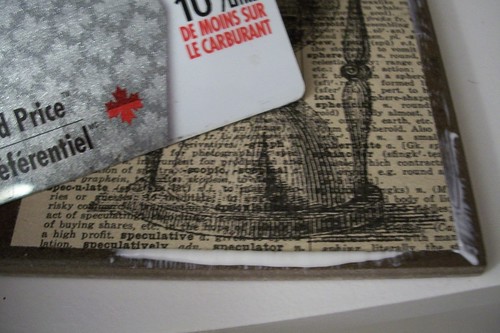
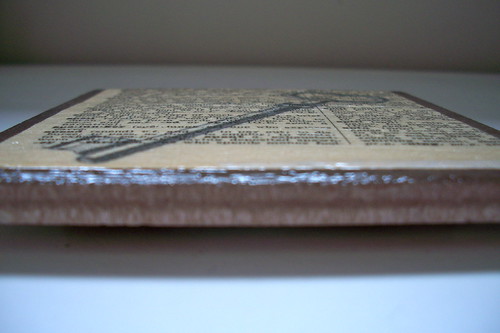
Once I was happy with how they printed I did a good copy onto some old book pages - also from my stash. I had received these dictionary pages from another crafty mind years ago when she was trying to de-stash!
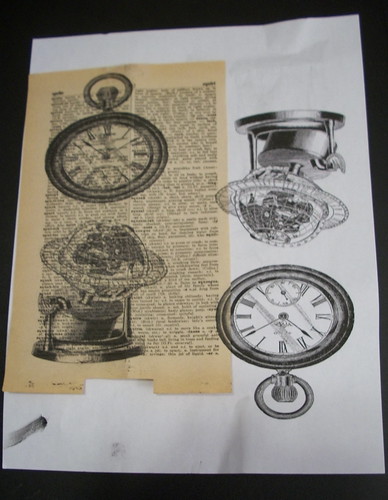
After I was done printing my images I trimmed them down to size for my coasters.
Next step was mod podge! I bought the outdoor stuff just to make sure that it held up against the moisture from glasses.
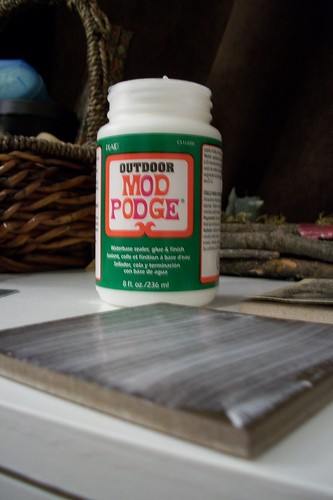
I used my trusted mod podge gift card to make sure there weren't any air bubbles under the paper.
Once that dried, I applied one coat of 'podge to cover the paper too. I usually use a regular paint brush to apply mod podge because I don't like the little foam brushes. I'm apparently too violent and break the little plastic thing on the inside all the time. I realize that using bristle brushes leaves brush strokes, but I've come to peace with it.
After they were dry I was ready to call it done. The outdoor mod podge however left them feeling tacky, and when you set a glass on them, it stuck. I found a clear sealer spray and gave them two coats of this, which fixed the problem!
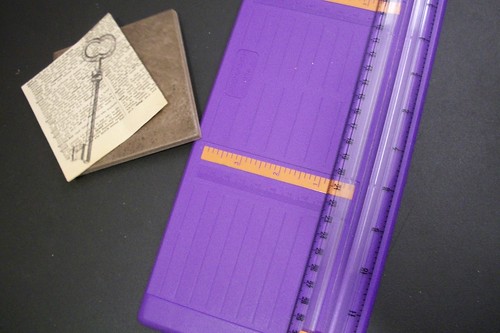
Here's where I have a confession to make. I had to *gasp* SHOP to finish this project. I know, it goes against the rules of stashbusting, but I ONLY bought what I needed, and I figured that the buying to busting ratio was more than reasonable, so I figured I could forgive myself.
I picked up a bunch of these little guys:
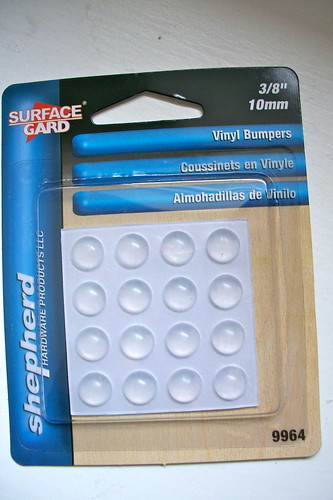
I know I could have busted even more stash by cutting up some felt or something similar to put on the bottom, but I really wanted them to have that professional, polished look.
I applied one to each corner like so
Voila!
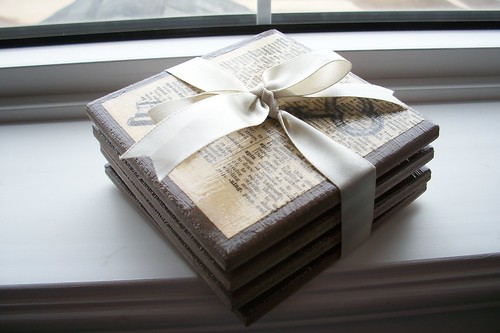
Reach into your stash and grab a ribbon to tie around them and they're ready to give to your bestie as a belated Chris-birth-gift! Total cost = $3.01 (not including printer ink/mod podge/sealer) This gift recipient reads my blog. Thank goodness she loves a great deal as much as I do! :P
One set down, a box of tiles to go!


I love your project! Love modge-podge, use it on everything, is fantastic, will try to make some coasters for sure.
ReplyDeleteHave a great day!
XXX Ido
I made coasters for my dearest friend using tiles and mod podge as well (didn't think to buy the outdoor stuff though). She and I are immersing ourselves in the French Revolution right now (we did Tutor England last year) and so I made six coasters for her of images from that time. I did have some frustration with the air bubbles and will be sure to use your card trick next time. Thanks for the hint! Just out of curiosity, are you referring to Restore in Vermont?
ReplyDeleteThose are so nice! I've got a bunch of vintage graphics from our favorite Fairy and a ton of vintage encyclopedias and other books. Thanks for the inspiration!
ReplyDeleteI love these!
ReplyDeletedid you use glossy or matte clear coat? I love them!
ReplyDeleteWhat a nice gift!
ReplyDeleteI just found the graphics fairy too, love her site!
ReplyDeleteHmmm, you may have convinced me to try some projects with their tiles. our re-store DID have a whole load of tiles, for wicked cheap!! great idea; I love how you used the old book pages!