Showing posts with label featured blogger. Show all posts

Thursday, 25 April 2013

30 Days of Salad! {Try to Keep Up}

This is me doing a little advertising work for my big sis Leslie at Try to Keep Up.
 
Last summer she put on a cute little series called 30 Days of Salad.  As the weather turns warmer (well, not in Saskatchewan!) our stomachs turn to salads.  Over the summer Leslie's blog will have 30 different posts of salads. 
 
I discovered the best salad by Bev at Flamingo Toes last summer.  It became my new go-to salad to bring to BBQs.  Although now that I'm not eating wheat, I'm not sure what I'll do (probably eat it and think about the consequences later!)
 
 
Anyway, she's still looking for people to contribute! If you're interested shoot her an email! westcoastleslie@gmail.com  

Friday, 1 March 2013

Blog-jacking!!!

From time to time I like to hop over to my sister's blog and try to embarass her.  Today I publicly announed that although she loves cooking and considers herself to be a bit of a foodie, she doesn't know how to make lasagna!!


Check it out! Head over to Try to Keep Up!

Linking up to:
The Shabby Nest

Sunday, 8 April 2012

Folder mini-album - Guest post by Amy

Special treat today - my bestie Amy is guest posting for me! I'll hand it over to her now!

Hi Envirocraftiness readers! I am (the infamous) Amy. It's so much fun for me to read Jill's blog and see my face or my party ideas appear on it, it's a bit like being famous! Jill has been really busy lately doing tons of fundraising and leading zumba classes and generally being awesome so I thought I would help her out by doing up a guest post. It's a bit deja vu for me, I used to have a blog or two but usually gave them up when I got bored of writing up posts.  I like making the projects way more than documenting them. So really, this is an extra big favor to Jill ;)

I was scrolling through pinterest the other day and saw a tutorial on Taylored Expressions about making a mini album out of a file folder and thought to myself, I can do that!

Photobucket 

Photobucket

I started with an 18"x11.5" folder (I measured once it was unfolded but the size really doesn't matter, I've used other sizes too and they have all turned out fine). Lay it out flat with a tab in the top right corner. I did mine backwards to how it is done on Taylored Expressions.  She puts the small tab in the top, I put the large tab. Either way works, mine just gave me a smaller pocket.
Photobucket

You fold up the bottom until it matched up with the top folder tab.
Photobucket

Next, fold the right hand side in half, bringing it to the middle seam.
Photobucket

Repeat with the other side. You should end up with an accordian folded pamphlet.
Photobucket

Cut out paper to fit the flat parts of the album. This is a great project for using up scraps!
Photobucket

To paper the inside, it is helpful to reopen the pocket.  I used both sticky squares and glue to really make sure the paper wasn't going anywhere. When I'm doing the full album I do all the insides, fold the pocket back up, and then decorate the front of the pockets.
Photobucket

Photobucket

I actually made a different mini album from a folder and showed it off to Jill.  She suggested I make a write up and she'd post the pictures of the first album. Well, I did one better and made a second album for the purposes of the tutorial. But I am also kind of lazy so I haven't finished the second one yet.  So here are the pictures of the finished first album instead!

Photobucket

Photobucket

Photobucket

Thanks for letting me take over your blog today Jill!


Thanks for the great tutorial Amy (and taking over when I'm super busy!!)  


Sumo's Sweet Stuff       Keeping It Simple 

Thursday, 9 February 2012

Twin Dragonfly Designs - Self Taught!

Photobucket


Today's featured blogger is Heather from Twin Dragon Fly Designs.  

(is this beanie not the cutest?!)

She decided to teach herself to crochet and clearly has done a wonderful job of it!!

Check out the amazing mug cozies she made! 
And if you really like them, but don't want to learn to crochet, you can buy them in her shop here! (and check out what those cozies are lying on...yup, dragonfly fabric!)


I want to teach myself how to knit one day, and Heather has proven that it is possible to be successful on your own!

Now head over there and show her some love!

Crocheted headbands - Try To Keep Up!

Photobucket

Today's featured yarn-y item comes to us from Leslie at Try to Keep Up!

Leslie made a ton of these adorable headbands! Perfect for winter - and those of us who like to sport a ponytail!


Check her out for more great projects!

Monday, 4 July 2011

Skor Cake

When I saw this on Dragonfly Designs I knew I had to try it!

Photobucket

I clearly need more practice in stacking cakes!!

Photobucket

It was so delicious - instead of icing, it's chocolate whipped cream with skor bits!! YUM!

And now Heather has done it again!!!


OMG - you are a terrible terrible woman....but not really - I kinda wanna live at your house! :P


Monday, 30 May 2011

I've been PINNED - OUCH!

I mean AWESOME!  

I don't know if you've all heard of Pinterest but it's "the place to catalogue the things you love"  It's pretty cool!
pinterest

I just read how to find out if you've been pinned here on The Speckled Dog.  So I tried it, not expecting to find anything, because I'm really not that cool.  :P

But guess what?! I have been!!!


I feel like a pretty big deal ;)  

Friday, 22 April 2011

Happy Earth Day & Blogiversary!!

One year ago today I was finished university, unemployed and needed something to do.  Blogging soon became that thing to do.  It was a great way to keep my sanity while searching for a job (what turned out to be a LONG - 7.5 month - process) and to keep from getting bored! 

I'm so grateful for all the friends I've made, all the things I've learned, and all of my wonderful readers! I look forward to so much more in the next year too!

I'd like to tell you that I have something wonderful and fun planned for today, but in truth, I've been super busy in my "real" life and here's why:

100_2596
(what's that you say? Not everyone hugs their car? I don't believe you!)

I finally bought myself a new car! A brand new on at that.  For 25 years I've been relying on others to get around - my mom, my boyfriend and the bus.  But now I have my own wheels and am very excited about what that means for my freedom (and crafting!)

Lastly, because it is Earth Day, I want to share a few ideas with you:

Instead of replacing countertop, give it a facelift with some paint!

Full tutorial here at Kara's Korner!  I'm trying to convince my sister we should do this in her kitchen!


Check out a bunch of ideas over at One Pretty Thing!


One of my favorite green crafting sites Crafting A Green World is having a giveaway!

And stop by The T-Shirt Diaries for her latest instalment of Upcylced Awesome!


Thanks for a great year everyone - I"m looking forward to many more!!

Sunday, 20 March 2011

Things I'm lovin'

I've seen a couple pillows made out of napkins and tea towels.  LOVE

Centsational Girl turned these


Into these

And Try to Keep Up turned these


Into this:


So simple with great results!

Friday, 11 February 2011

Upcycled fun with Kimberly!

Hi Everyone, today I'm doing my first ever blog swap and it couldn't be with a nicer person!  Kimberly wrote an awesome introduction, so I'm not going to babble here too much!  Check out her tutorial for a tee shirt necklace here and stop by bugaboo, mini mr and me where I've created a tutorial on how to make a mini scrapbook album from cds!  With that, I'll let her take over!


Hey Envirocraftiness folks!  I’m so excited to be doing my first ever blog swap at Jill's!  Jill and I “met” when we both guest judged a “stashbust” challenge for another talented blogger and it was evident we shared a love of upcycled crafts!  Because everyone can use good ideas for making old things new again, I've decided to show you a little number I call The T-Shirt: Necklace Style.  
That’s right!  We’re making a necklace out of an old T-shirt.  
You’ve gotta have the following items:
An old t-shirt (obviously)
matching thread
various sized ugly beads (also from the stash!) 
Scissors (a rotary cutter would be better...)


And that’s it guys!  
An explanation: you don’t really have to use ugly beads, but I figure, why not?  You aren’t going to see them at all anyway.  So for mine I used some mardi gras beads I cut apart and two other types of beads from necklaces that have broken and never been repaired.  This gives me three sizes total to work with, which I think is perfect - but you can use more or less.

Here are my beads with a penny for size reference.


Alright.  Lay your shirt out flat and cut the bottom off.  (as I said, a rotary cutter would work loads better.  But mine was all the way down in the basement, like a whole 12 stairs away, so I used the kitchen sheers.  Don’t judge.)

Now, measure up from the bottom about 3-4 inches or so and cut across.

Do this again, so you have two double layer rectangles of shirt torso.

Now, take one of those rectangles and cut both side seams off 

so you end up with two single layer rectangles.

Cut both of these rectangles into 1 inch (ish) strips from one side and stopping about an inch from the other side.


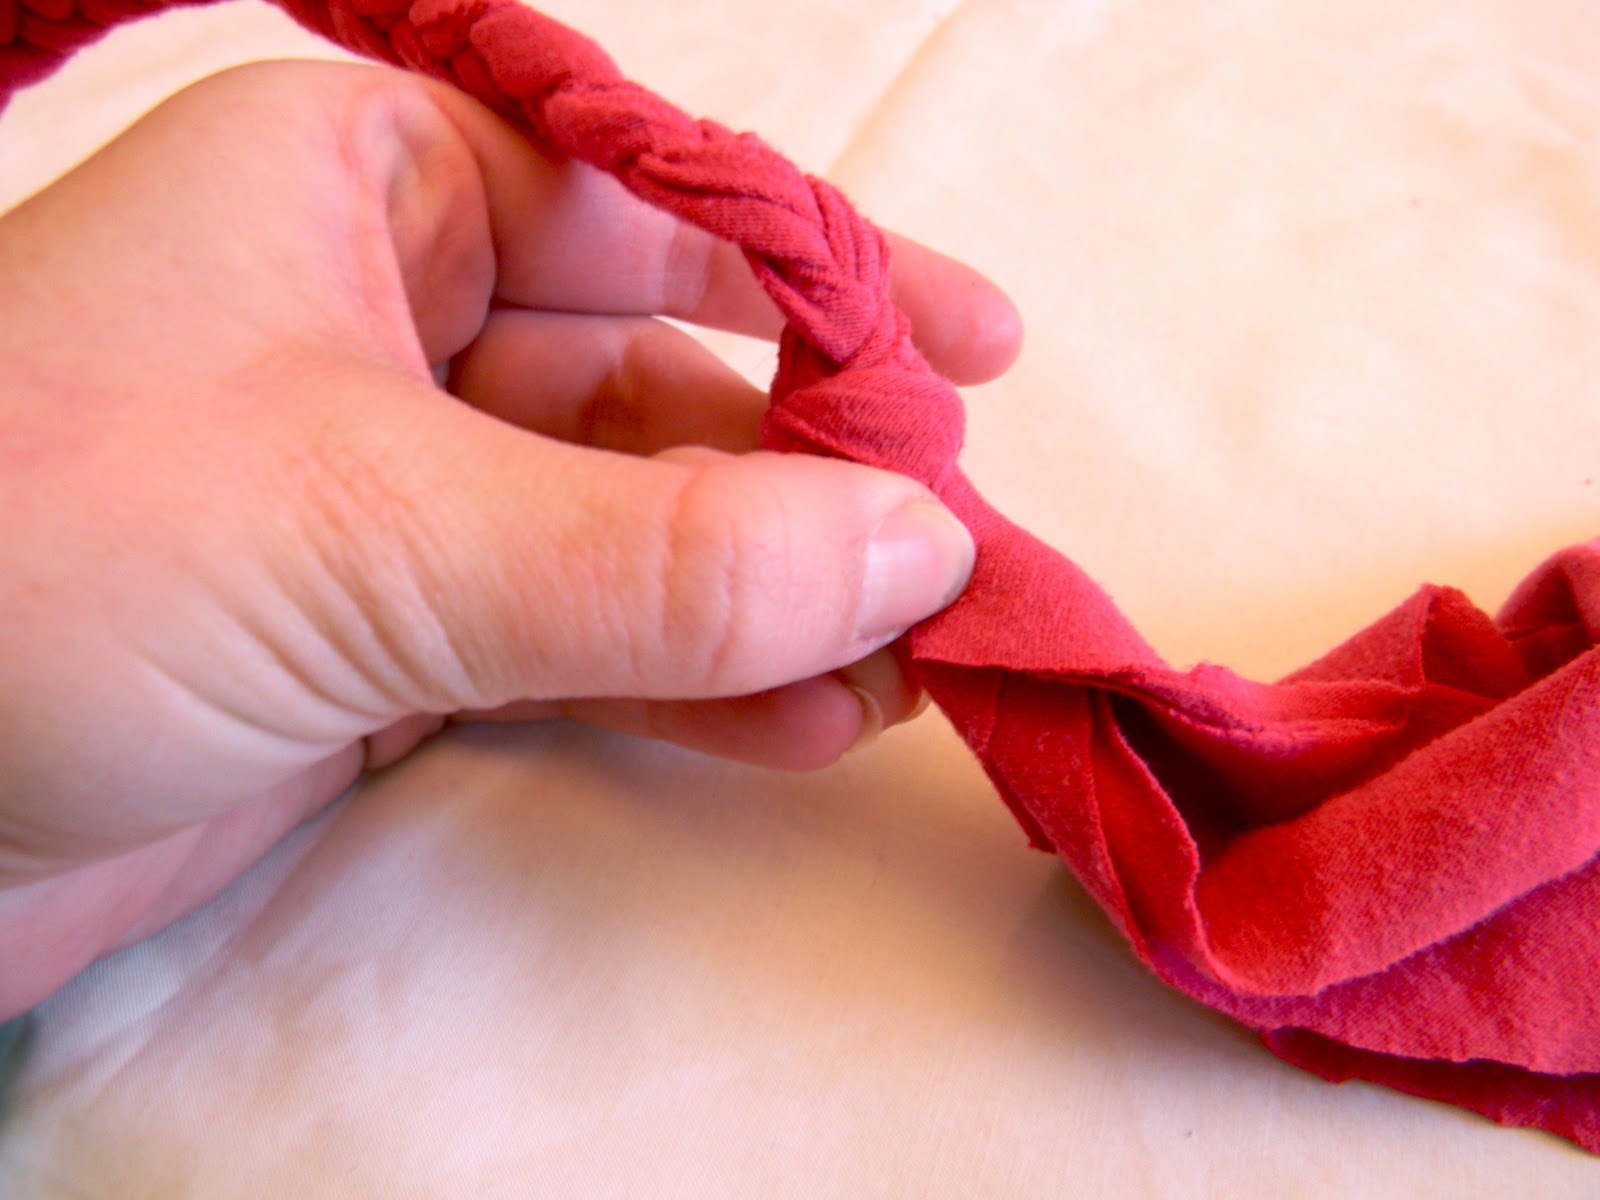
Tie this end in a knot

and braid the strips down, leaving a tail.

Do this with both and make sure there are a few inches of unbraided shirt left.

Take a piece of thread and wrap it around the end of the braid a few times,

then double knot it.


Now, cut the two side strips off, leaving only the middle one long.  Do this to both strips.

Set these two braids aside.

Move on to the next double rectangle. 

Cut only one side seam off, then cut the long rectangle into strips that are about an inch (ish) wide.  Cut a bit of length off one, and a bit more off the third so that all three strips are a slightly different length.

Layer these strips one on top of the other with the ends lined up.

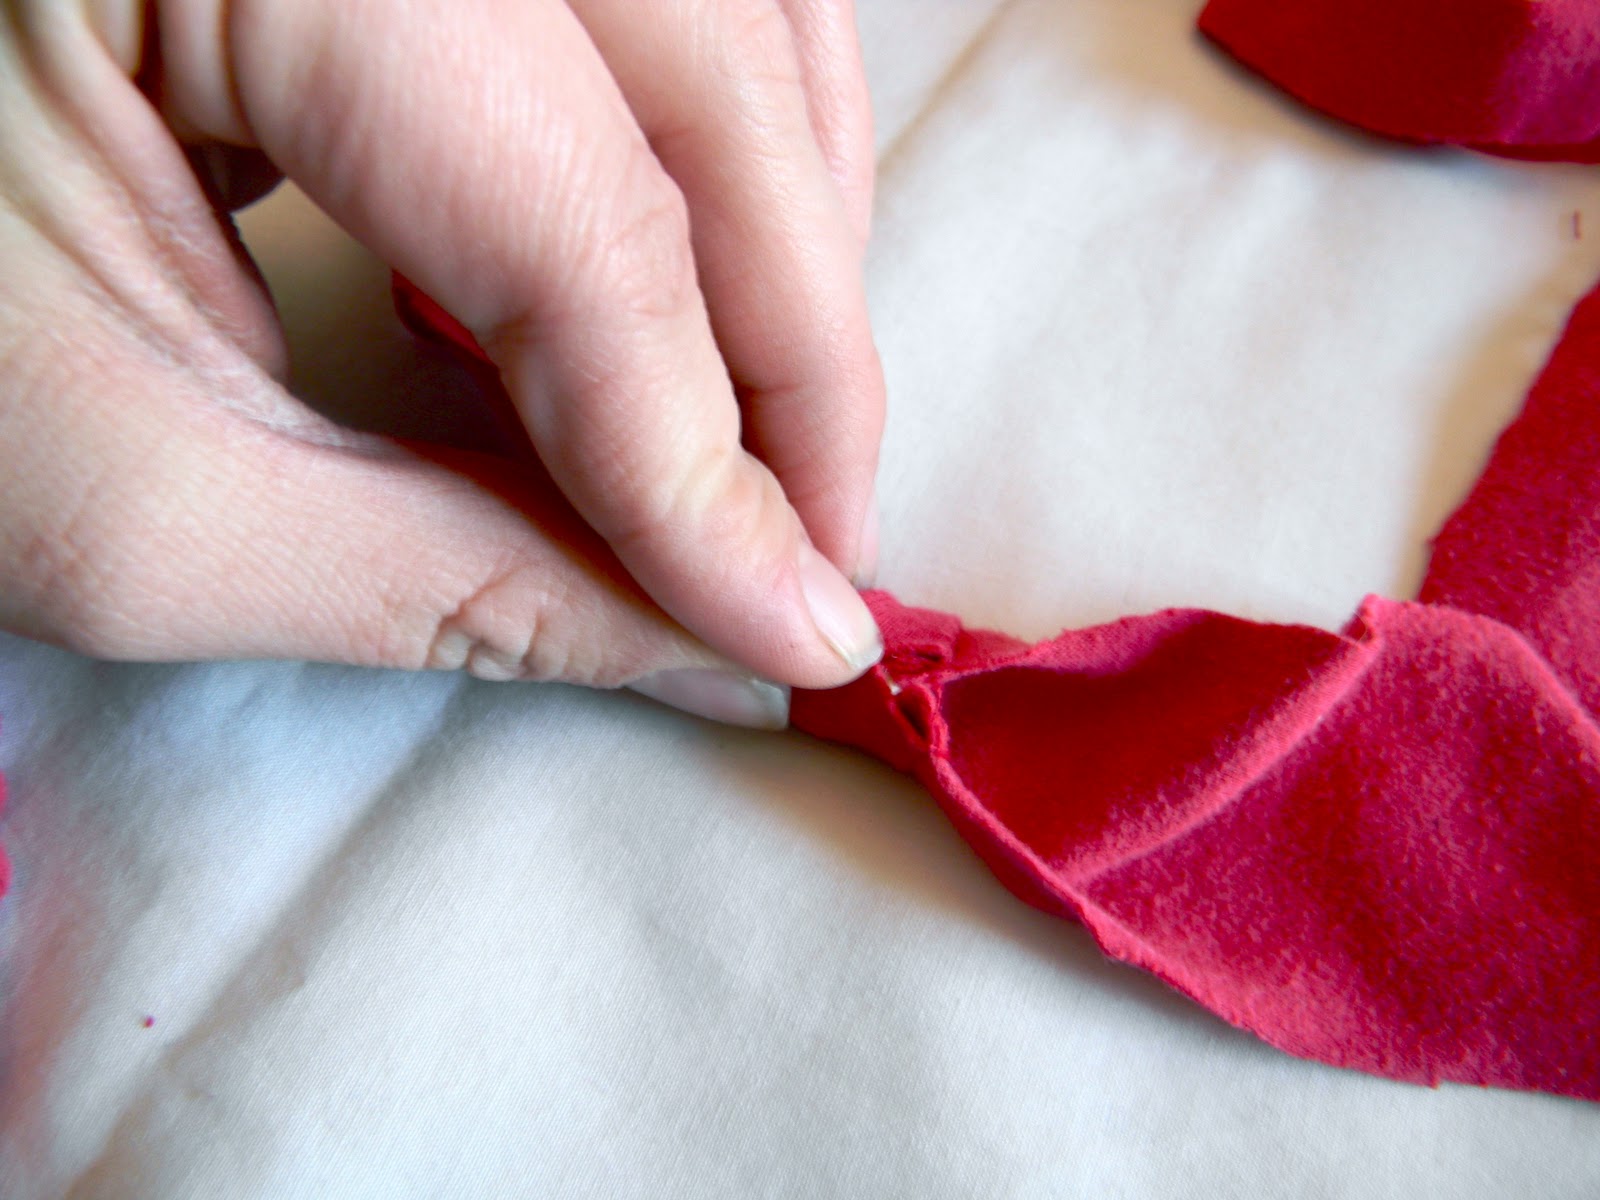
Place the KNOTTED end of a braided piece over the strips.

Wrap the sides up and around the braided piece where they overlap.

Take a piece of thread and wrap a few times around, then tie in a double knot.


Do this same thing with the other end of the strips and the other braided piece.


I should have taken a picture of the whole thing at this point, but I forgot.  You would have, if laid out flat, from left to right: a braided piece, knot, tied end of strips, three different lengths of flat t-shirt strips, tied end of strips, knot, and the other braided piece. 

Have I thoroughly confused anyone with my convoluted explanations yet?  Good.

Start beading with the longest strip first.  Use your little beads.

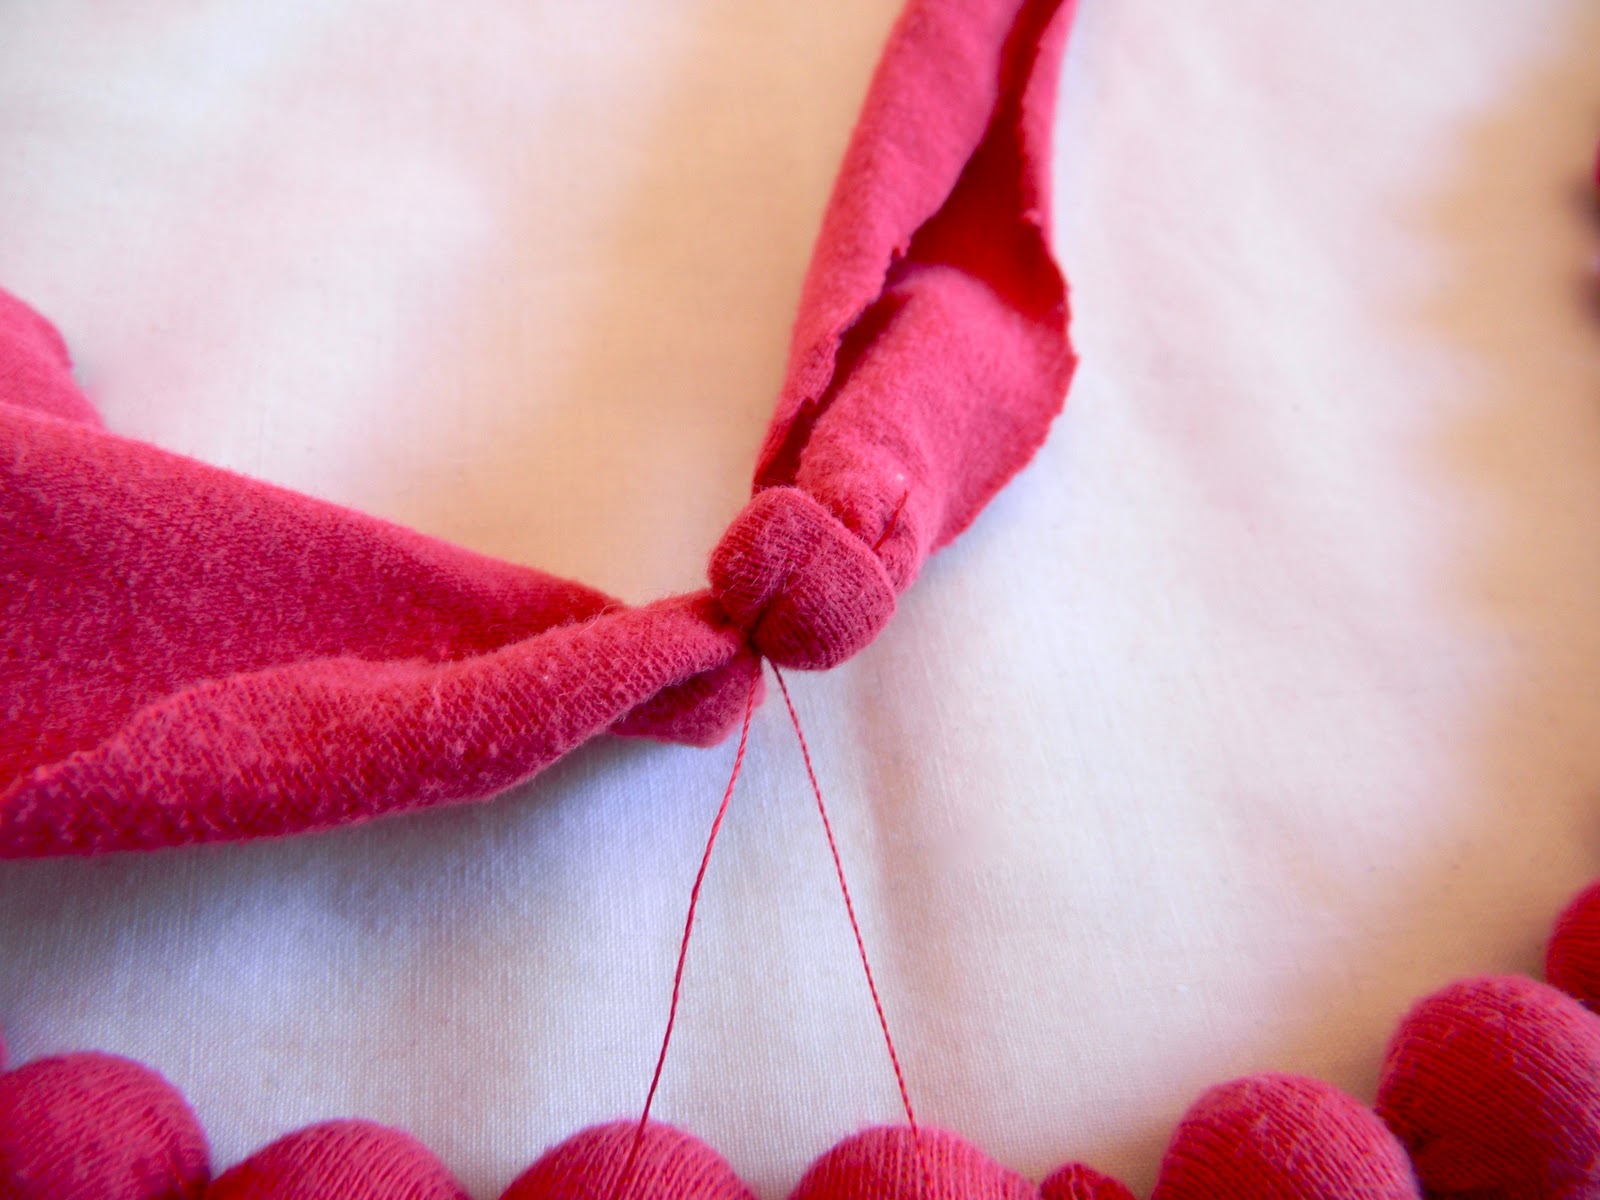
First, tie a piece of thread around the seam - which should be approximately in the middle of the necklace - pull it tight and tie it in a double knot.

Now, stick your little bead in the strip, right up against the thread knot, 

and wrap the sides of the strip around.

Take a piece of thread and wrap it around the strip a few times, then double knot it.

Place a second bead right after this knotted thread. 

Pinch the strip up and around the bead again,

wrap a piece of thread around it a few times,

and tie in a double knot.

Repeat.


Repeat.


Again and again.


At this point, you may question the whole decision to make this.  If you didn’t know it would be so cool, you just might stop now. 

Because you started at the seam in the middle, you will need to go both directions.

Right about here is where you start to worry you may run out of blue beads.

And when you get to the end of a strip, just tie some thread around it and knot.

Phew!  One down, two to go!

Start at the seam in the middle again.

Tie some thread around it and knot, just as you did before.

Move on to your medium sized bead, and place it next to the tied up seam.  Wrap the sides up and around.

Use thread to wrap a few times and double knot.

Repeat. Again and again - you know the drill.

And there’s the second strip all done!

For the third strip, knot a little bead right there in the seam, as you did with the first two.  (Good thing you found another blue mardi gras beaded necklace!)

Then, add a little bead on either side.

And the biggest bead on either side of that.


Then just repeat this pattern

until you run out of big beads.  Or, until you run out of strip.  Whichever comes first.

If you, like me, run out of big beads first, then just fill the rest of the strip with little beads. 

Now, inspect.

Some of your necklace may look like a fuzzy caterpillar, which isn’t really what we’re going for.

So, take a small sharp scissors (NOT your kitchen sheers) and trim those threads away.

Tie the ends of the braided pieces in a cute little bow.

You are done!

I think this t-shirt looks much better as a necklace than as a pile of rubbish on the shelf.


If you’d like to see more upcycled t-shirts, check out my Strips and Scraps T-Shirt Vest.
I also have some other fun things on my blog, like DIY stained glass, kid’s crafts, yummy recipes, a LOT of wreaths, and more!

Thanks for having me over, Jill!


Thanks Kimberly! This necklace is killer! 
 
>